Sunday, March 29, 2015

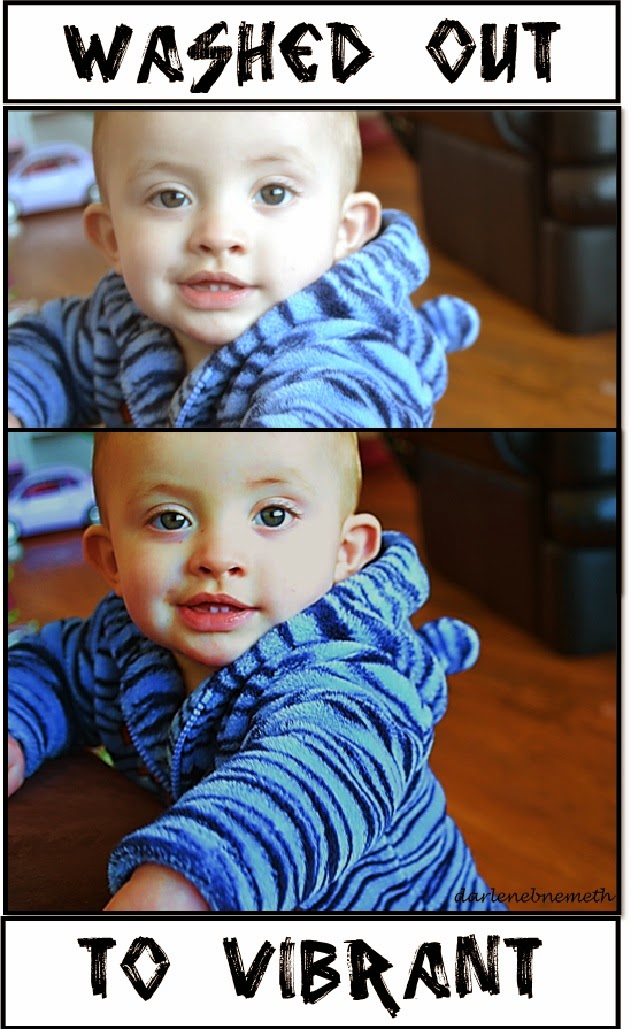
Turn Washed Out Pics into Vibrant Photographs


Please Share the Love


If you are like me, your pics don't always turn out as you imagined. But never fear photo editing programs can turn washed out pics into vibrant photographs. In particular we are using MS Word.


photography editing tips


Insert Photo

First you will need to insert a picture into a word document.

Click on the Insert Tab as shown on the Diagram 1.
A window pops up. Locate your picture on your computer. Select it by clicking on it once then press the insert button or double click the image.

photo editing tutorial

Formatting the Picture

Now comes the fun part.

Select your picture by clicking on it once.

A new tab will appear on the top of your screen. It will say, Picture Tools, Format. Click on that tab.

Look at Diagram 2. These are all your photo formatting tools. We’re concentrating on these three: Corrections, Color, and Artistic Effects.

photo editing tutorial


 Correction Tool

Each photo adjustment tool has set variations you can choose from. Look at Diagram 3.


You can tell which variation is being used on this particular photo because it is outlined in yellow. This one is set as the original image.

Sharpen and Soften.

Any deviation to the left of this section makes the image less in focus – a little blurrier. Moving to the right sharpens the photo image. This can help slightly if you photo is on the blurry side or you want to see more detail.

Brightness and Contrast. 

If your image is too dark or too light this is where you can make those changes.

Picture Correction Options. 

Each adjustment tool also has further options where you can fine tune the variations – in case the standard ones aren’t to your liking.  

Select the Picture Correction Options button as shown in Diagram 3. The Format Picture window pops up as shown in Diagram 4. Now you make very specific changes as required.


Color Tool

Each photo adjustment tool has set variations you can choose from: Color Saturation, Color Tone and Recolor as shown in Diagram 5.


POST A COMMENT
I love to read your opinions and comments. It makes my day a little bit brighter. 

My apologies, all anonymous comments are deleted due to an excessive amount of spam.


Bye for now. 

Wishing you the best, Darlene

Friday, March 27, 2015

March Creative Challenge Link Party #3 - Clothing

Welcome to the last week of this months Craft Challenge! 


For the month of March, the material we are challenging you to repurpose, recycle, or upcycle is Denim (Clothing).


The Craft Challenge Creative Link Party 
is brought to you by:

Kristina & Millie @ 2 Crochet Hooks Blog/Pinterest/FB/Twitter

Bonnie @ Our Secondhand House Blog/Pinterest/FB/Twitter

Robin @ Redo It Yourself Inspirations Blog/Pinterest/FB/Twitter

Darlene @ Let It Shine 

Becky & Glenna @ My Paper Craze 


New Craft Challenge Creative Link Party

I hope you will consider following your hosts.
It's a nice gesture, though not required :) 

Your hostesses will announce on the first Friday of the month what the crafting challenge is - typically this will be a common item found in or around your home - you must use this item in your creation. 

You then have until the last Friday of the month to complete your project and link it up below. You may link up a previously completed craft but we hope you will be inspired to create something new!


36 Projects Made From Old Denim JeansI am adding another previously posted project this week. It is one of my favorite projects and I hope you'll like it too.

36 Fun Projects Made From Old Denim Jeans


Pink jeans and lace bracelet


This weeks feature is:
Julie's jeans and lace bracelet. Isn't it lovely?


The Upcoming Material Challenges:
  • April: Paper Bag
  • May: Silverware/Flatware
  • June: Washroom tissue/Paper Towel Rolls
  • July: Twigs (Something from Nature)
  • August: Food Cans
  • September – dishes/glass/plastic/metal
  • October – broken jewelry
  • November – margarine/cool whip bowls
  • December – unique wreath

RULES:
1. Use the material we are currently challenging: Denim (+ anything else)
2. Make sure the project is reused, recycled, or upcycled.
3. Come back as many times as you want (with cardboard); the party lasts the entire month.
4. Link up your own projects.
5. Have fun creating your Craft Challenge project


An InLinkz Link-up


POST A COMMENT
I love to read your opinions and comments. It makes my day a little bit brighter. 

My apologies, all anonymous comments are deleted due to an excessive amount of spam.


Wishing You a Wonderful Week.

Sunday, March 22, 2015

Make Your Pics Pinteresting- A Photo Editing Tutorial


Please Share the Love
Hi. Welcome. I am so very happy that you decided to stop by for a visit.

I thought I might share something a little different with you today.

I’ve read quite a few blog posts lately with instructions for PicMonkey. It seems to be very popular with most bloggers.

I personally haven’t used it. When it comes to photos or images, Microsoft Word and Paint have all the features I need.  I’ve used these programs for years so I was glad to be able to find a laptop that at least had the Starter version already installed.

So, for all those bloggers out there who also have Word and Paint, or are considering getting those programs, I am going to show you what you can do.


Today I’m going to share the many ways that you can format a photo. Are you ready? Let’s go!

Insert Photo

First you will need to insert a picture into a word document.

Click on the Insert Tab as shown on the Diagram 1.
A window pops up. Locate your picture on your computer. Select it by clicking on it once then press the insert button or double click the image.


Formatting the Picture

Now comes the fun part.

Select your picture by clicking on it once.

A new tab will appear on the top of your screen. It will say, Picture Tools, Format. Click on that tab.

Look at Diagram 2. These are all your photo formatting tools. We’re concentrating on these three: Corrections, Color, and Artistic Effects.


 Correction Tool

Each photo adjustment tool has set variations you can choose from. Look at Diagram 3.


You can tell which variation is being used on this particular photo because it is outlined in yellow. This one is set as the original image.

Sharpen and Soften.

Any deviation to the left of this section makes the image less in focus – a little blurrier. Moving to the right sharpens the photo image. This can help slightly if you photo is on the blurry side or you want to see more detail.

Brightness and Contrast. 

If your image is too dark or too light this is where you can make those changes.

Picture Correction Options. 

Each adjustment tool also has further options where you can fine tune the variations – in case the standard ones aren’t to your liking.  

Select the Picture Correction Options button as shown in Diagram 3. The Format Picture window pops up as shown in Diagram 4. Now you make very specific changes as required.


Color Tool

Each photo adjustment tool has set variations you can choose from: Color Saturation, Color Tone and Recolor as shown in Diagram 5.


Once again, you can tell which variation is being used on this particular photo because it is outlined in yellow. 

This one is set as the original image.


Color Saturation


And now the complete opposite side of saturation.


Color Tone

Recolor


Artistic Effects Tool

Each photo adjustment tool has set variations you can choose from. Look at Diagram 9.
Once again, you can tell which variation is being used on this particular photo because it is highlighted in yellow.

This one is set as the original image.

These are all the artistic effects:
  • None
  • Marker
  • Pencil gray scale
  • Pencil Sketch
  • Line Drawing
  • Chalk Sketch
  • Paint Strokes
  • Paint Brush
  • Glow Diffused
  • Blur
  • Light Screen
  • Watercolor Sponge
  • Film Grain
  • Mosaic Bubbles
  • Glass
  • Cement
  • Texturizer
  • Criss Cross Etching
  • Pastels Smooth
  • Plastic Wrap
  • Cut Out
  • Photocopy
  • Bright Edges


From Microsoft Word Picture Format 7 to 15 are examples of the artistic effects.


 Well that's it for this week. Which is your favorite?


POST A COMMENT
I love to read your opinions and comments. It makes my day a little bit brighter. 

My apologies, all anonymous comments are deleted due to an excessive amount of spam.


Bye for now. 

Wishing you the best, Darlene