Friday, January 30, 2015

February Creative Challenge Link Party #2 - Cardboard


Hello everyone!! 

Welcome to our monthly Craft Challenge! The fun party where we challenge you to make a craft then link up to show it off !


New Craft Challenge Creative Link Party
The Craft Challenge Creative Link Party 
is brought to you by:

Kristina & Millie @ 2 Crochet Hooks Blog/Pinterest/FB/Twitter

Bonnie @ Our Secondhand House Blog/Pinterest/FB/Twitter

Robin @ Redo It Yourself Inspirations Blog/Pinterest/FB/Twitter

Darlene @ Let It Shine 

Becky & Glenna @ My Paper Craze 


****Please follow your hostesses via your choice of social media. Not required but it is the nice thing to do! :) ****

Your hostesses will announce on the first Friday of the month what the crafting challenge is - typically this will be a common item found in or around your home - you must use this item in your creation. 

You then have until the last Friday of the month to complete your project and link it up below. You may link up a previously completed craft but we hope you will be inspired to create something new!

Oh yeah, I think it's getting a little crafty in here!


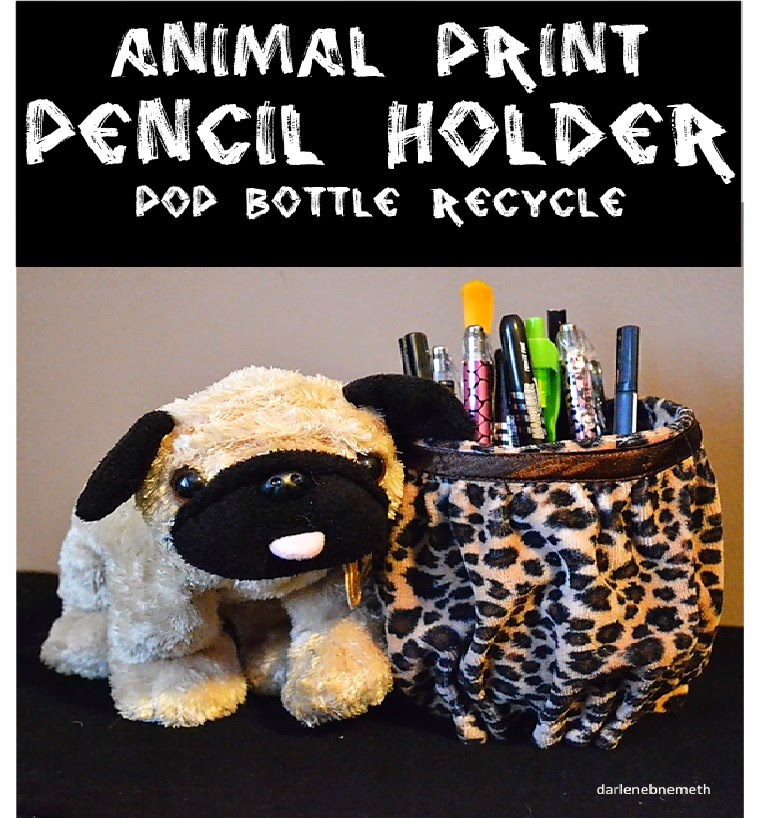
This months Craft Challenge is:
Cardboard Boxes . . .

. . . and this is my contribution.


Craft Challenge Creative Link Party Button


RULES:

  1. Project must use the challenge item (and any others needed to complete your project).
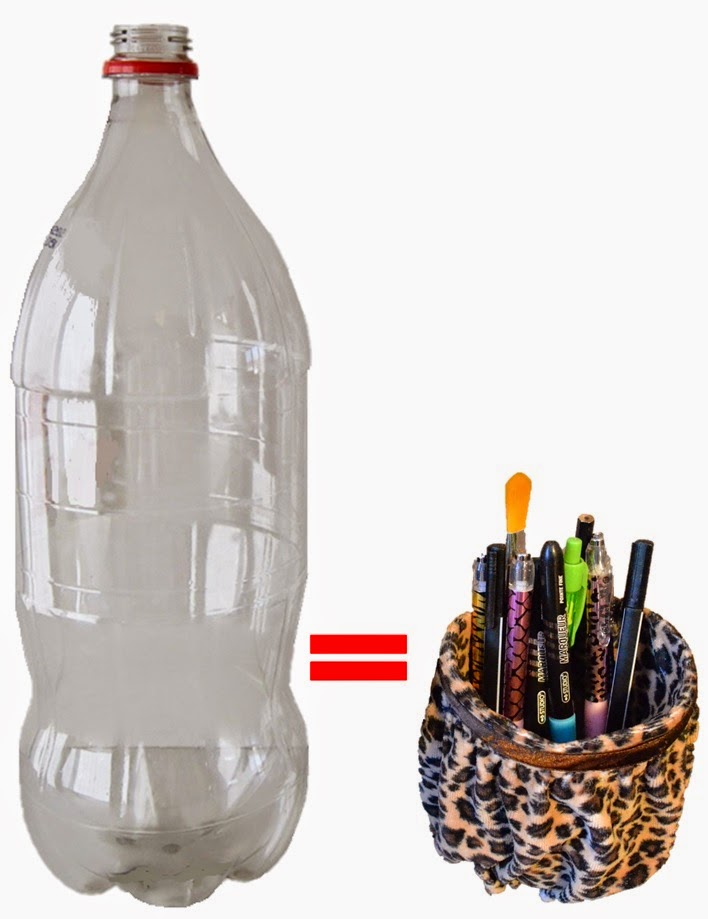
  2. Project must be  recycled /upcycled /repurposed!
  3. You must have a fun time creating your Craft Challenge project!
  4. Party runs all month so come back often and link up new or old projects!
  5. Please link up your own craft challenge projects - no round ups, sale/etsy sites, etc. Inappropriate links will be removed.


Sound fun? We thought so!

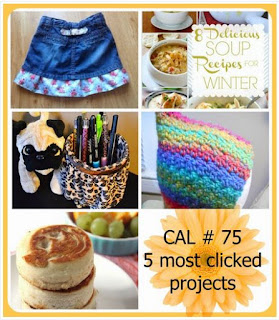
This link up will run all month with the hostesses favorites featured at the end of the month. Check back often for new ideas and fun crafts to try and link up your own! 

Let us know if you are interested in hosting!

Thanks for crafting with us, Darlene


An InLinkz Link-up


POST A COMMENT
I love to read your opinions and comments. It makes my day a little bit brighter. 

My apologies, all anonymous comments are deleted due to an excessive amount of spam.


Wishing You a Wonderful Week.

Sunday, January 25, 2015

Pretty as a Picture - DIY Frame


Please Share the Love

Have you ever bought something because you thought, I can make something with that? Or kept something because you thought, I can use that for a project? But had no clue what you could use it for?

Well that's how this pretty little DIY Picture Frame came to be.


Fabric Covered Picture Frame


I knew I wanted to make something with these simple rolled felt flowers that I saw on the net.

I had these red and white felt Christmas tree skirts that had no purpose other than waiting to be used on some kind of project.

The felt cried out to be made into roses so that is exactly what I did with the red felt. 

Not wanting to leave the white felt out I decided to use it to cover the frame.

Once it was assembled the frame looked a little naked. That's when I decided to grab the dollar store red doily which I purchased for just an occasion.

Now I could have stopped here but I had to get those darling roses on the frame somewhere. After all it began with the roses.

Odd numbers are usually best so I made three felt roses and glued them down.

For a bit more pizzazz I scrunched in the lace around the flowers.

Supplies
  • Photograph
  • Cardboard
  • Felt (Fabric of your Choosing)
  • Scissors
  • Sharp Blade
  • Hot Glue Gun
  • Bead
Instructions

  • I guess you need to find a picture that you would like to frame because it will determine the finished size of your frame.
  • Once you have the dimensions cut two pieces of cardboard. One is for the front and the other is for the back.
  • Draw the frame opening. It should be at least 1/4" smaller than your photo. 
  • Place your photo onto your cardboard to make sure the size you choose will work.
  • Using your straight edge and knife, cut the frame opening.

*** To get sharp corners extend the lines past them. Do the same when you are cutting the cardboard. ***


  • Trace your cardboard frames onto your chosen fabric. In my case it is white felt.
  • Cut the fabric with a 1 1/2" allowance all around the outer edge.

  • Cut out a second piece of fabric using the first as a guideline. Just remember only one piece needs the inner opening.

  • Start with the back panel. Lay the cardboard onto the fabric. 
  • Cut the corners of the fabric as shown in the photograph. This will eliminate bulky corners once you glue the fabric to the cardboard.
  • Place a bead of hot glue along the top edge of the cardboard.
  • Press the fabric down. Careful it's hot.
  • Do the same on the bottom edge pulling gently to remove wrinkles.
  • Do the same for the two sides.
  • Now work on the front of the frame following the instructions for the back of the frame. Only this time cut the opening in the middle of the frame. 
  • Miter the corners on the inside too.
  • You may want to skip this part depending on the fabric you chose.
  • Place the lace on top of the frame.
  • Cut opening in center of the lace. 
  • Hot glue the front of the frame to the back of the frame leaving the top open so you can slide your picture in.
  • Embellish your frame further if desired. I made three rolled felt roses and glued it to the frame. I scrunched up a bit of excess lace and hot glued it close to the roses. I finished it off my gluing small bells into the center of the roses.


***  Tutorial for the roses can be found HERE. ***


What do you think? Easy enough? 

Now what can I make?
POST A COMMENT
I love to read your opinions and comments. It makes my day a little bit brighter. 

My apologies, all anonymous comments are deleted due to an excessive amount of spam.


Wishing You a Wonderful Week.


Sunday, January 18, 2015

Animal Print Pencil Holder - Pop Bottle Recycled


Please Share the Love
Hi again. I thought I'd try another recycle project for the Creative Challenge.

My last creation was called Magical Transformations which you can see HERE.

It was whimsical, sparkly and pretty. Just what every princess needs.

This week I'm making something I need. I know I can go out and buy something but what fun would that be. Besides I can make exactly what I want in a few minutes and say it only cost pennies.

So here it is. My animal print pencil holder made from a pop bottle. And my granddaughters old skirt. And hot glue.


It turned out perfectly. Exactly what what I needed. All my pens, markers and pencils fit.

Supplies
  • pop bottle
  • sharp blade
  • scissors
  • hot glue gun
  • fabric - I used and old skirt.

This is how I made it.
  • First I started by cutting an opening in the side of the bottle about an inch above the height that I wanted my finished holder to be.
  • Then I used scissors to carefully make my way down the plastic bottle to the finished height that I wanted it to be. It just makes it easier to cut it this way rather than going straight to the finished line.
  • The skirt was actually a good size for the height. I just had to cut off the elastic band.


  • Now the fun part. The hot glue gun. I'm not sure what it is about the glue gun that makes it such fun. Anyway. I put a dab of hot glue on the bottle then pressed the fabric in place. Be careful. That is hot glue. Ouch.
  • Once the top was completed, I glued the material to the bottle of the bottle. To make it even, I glued it into place by alternating sides back and forth instead of just working my way around.
Lucky me, I didn't have to add the ribbon. It was part of the skirt and it fit perfectly in place near the top of my pencil holder.


And look. My granddaughter approves. Her little stuffy came to visit.


What do you think? Easy enough? 

Now what can I make?

Hold on one minute. Check it out. Maz featured this post as one of the top five most clicked posts.
POST A COMMENT
I love to read your opinions and comments. It makes my day a little bit brighter. 

My apologies, all anonymous comments are deleted due to an excessive amount of spam.


Wishing You a Wonderful Week.


Wednesday, January 14, 2015

Wordless Wednesday - Jumping into the Deep End

 WELCOME TO WORDLESS WEDNESDAY...


POST A COMMENT
I love to read your opinions and comments. It makes my day a little bit brighter. 

My apologies, all anonymous comments are deleted due to an excessive amount of spam.


Wishing You a Wonderful Week.

Saturday, January 10, 2015

Crocheted Hat and Mitten Set


Hi there. Hope your week is going well. 

I've been busy crocheting.

The first project in a series of posts is this brilliant pink hat and mitten set.


Crocheted Hat and Mitten Set Pattern


I've been wanting to make a pair of mitts for some time now and I finally got around to doing it. 

Of course if I'm making mitts I have to make a matching hat. I started with the hat because I'm an old pro at making those now.

I decided to dress it up a bit more by adding the grey stripes.The last row of the hat is single crochet row of grey and the upper level of grey is stitched on.

HERE is the basic hat pattern. And the large flower pattern HERE.

I did the same thing with the mitts and added one small flower to each one.

This is the mitten pattern for a child`s medium.


Mittens Pattern
Make 2


Ch 2. 

1st Round: 5 sc in second ch from hook. Join in first sc.

2nd Round: Ch 1, 2 sc in same sc and in each remaining sc. Join in first sc - 10 sc.

3rd Round: Rep round 2. At end of round - 20 sc.

4th Round: Ch 1 ,sc in same sc and in next sc. * 2 sc in next 2 sc; rep from * 5 times more. Join in first sc - 26 sc.

5th Round: Ch 1, sc in same sc and in each reamining sc. Join in the first sc. 

6th Round: Ch1, sc in same sc. Skip next sc. *sc in next sc. ch 1. Skip next sc. Repeat * around. Join in first sc. 

7th Round: Sl st in next ch. 1 sp, ch 1. sc in same sp. ch 1. * sc in next ch1 sp. Ch1. Repeat from * around. Skip first sc. Join in next ch1sp.

8th Round: Ch 1. sc in same sp. ch 1. * sc in next ch1 sp. Ch 1. repeat from * around. Skip first sc. Join next ch1 space.

Repeat round 8 until peice measures 5 inches.

Thumb Opening.
1st Round: Ch 1, sc in same spaceé (ch 1 , sc in next ch1 space) 6 times. ch 7. Skip next 5 stitches. (sc in next ch1 sp. ch1. Skip next sc) 6 times. Join in first ch1 space.

2nd Round: Ch 1, sc in same sp. (ch 1 sc in next ch1 sp) 5 times. Ch 1, skip next sc. Sc in next 7 chs. Ch1 (sc in next ch1 sp, ch1) 7 times. Skip first sc. Join in next ch1 space.

3rd Round: Ch 1, sc in same sp. (ch 1 sc in next ch1 sp) 5 times. (Ch 1, skip next sc. Sc in next 3 (times). Ch1, skip next sc, (sc in next ch1 sp, ch1) 7 times. Skip first sc. Join in next ch1 space.

4th Round: Ch 1, sc in same sp. Ch 1, *sc in next ch-1 sp. Ch1. Repeat from * around. Skip first sc. Join in next ch-1 sp.

Rep Round 4 until mitten measures 1 1/2 ìnches from thumb opening.

Last Round. Sc with grey.


Thumb

Thumb is worked in continuous rounds. Mark beginning of rounds.


1st Round: Ch 1, sc in same space and in next ch1 sp. sc in side of next sc, in unused lps of next 7 chs and in side of next sc - 11 sc. 

2nd Round: Sc in each sc.

3rd Round: Sc in next 4 sc, dec over next 2 sc. Sc in next 5 sc - 10 sc.

4th Round: Sc in each sc.

Rep Round 4 until mitten measures 1 1/2 ìnches from joining.

Decrease Round: Dec 5 times. Finish off, leaving a 7`` end.

With tapestry needle, draw end through remaining stitches and pull tight.

Weave in all ends.

Fold down cuff as shown in picture.

Stitch a row of grey yard around cuff.

To make the small flowers for the mitts refer to this pattern HERE and just make the first set of petals.

With a darning needle attach the flowers on top of cuff.

Tada! All done.


Crocheted Hat and Mitten Set Pattern


Thanks Maz for featuring my hat and mitten set at your Link Party.


POST A COMMENT
I love to read your opinions and comments. It makes my day a little bit brighter. 

My apologies, all anonymous comments are deleted due to an excessive amount of spam.


Wishing You a Wonderful Week.